0. Introduction
Meteorite is a powerful multipurpose WordPress theme for business and portfolio websites. It brings everything you need to create an expressive website: Control over all colors and access to more than 800 Google fonts to match your corporate identity, header image or slider, different navigation types, multiple blog layouts and more than 20 widgets. Meteorite is built with SEO in mind, responsive, translation ready and supports the page builder by SiteOrigin and Elementor. Start creating your website with Meteorite!
This site explains how to build your website using Meteorite in combination with SiteOrigin Page Builder, Terra Themes Tools (for Custom Post Types) and Meteorite Extensions (widgets, page builder extensions and more).
01. Installation
a. Install the theme
Go to Appearance > Themes > Upload Theme > Choose file and upload your ZIP archive previously downloaded from the WordPress repository. Or find and install it by searching in Appearance > Themes.
After that make sure to visit the Meteorite Info page at Appearance > Meteorite Info. This page explains the recommended plugins and demo import.
b. Install the recommended plugins
Install Page Builder by SiteOrigin through the WordPress plugin repository.
Also install the Terra Themes Tools plugin (for custom post types like projects, employees, Terra Slider slider etc.) and Meteorite Extensions (for widgets, extended page builder support).
c. Demo import
Automatic import
Install One Click Demo Import through the WordPress plugin repository and activate the plugin. Afterwards navigate to Appearance > Import Demo Data and choose one of the demo layouts. You can preview the layout by clicking on Preview or import it with Import. Before you import the layouts you should make sure that all of the recommended plugins are active. Otherwise, some data may not be imported or may not be displayed correctly.
The import will create two pages Home and Blog and assign them as the front page and blog page. Also the customizer settings, widgets and media will be imported. If you already have a page called Home or Blog, you should rename them before importing. Also, make sure to replace the imported images with your own or ask the team about the licenses of the images.
Manual import
Download the XML file for the demo content of the layout you want and import it with the default WordPress importer after you installed the WordPress Importer plugin. The XML files can be downloaded here: Default XML file, Agency XML file, Construction XML file, Law XML file, Charity XML file.
02. Static front page
If you have imported a demo layout you can skip this step.
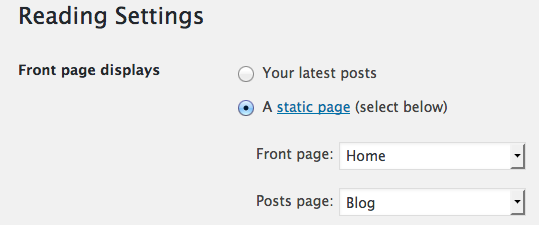
Create a new page through the dashboard and then go to Settings > Reading and choose your created page as the front page under Front page displays. The front page is the home page where you will most likely present your content.
If you want a blog page, create another page and set it as Posts Page. This will be the page where all of your posts show up.
03. Setting up your menu
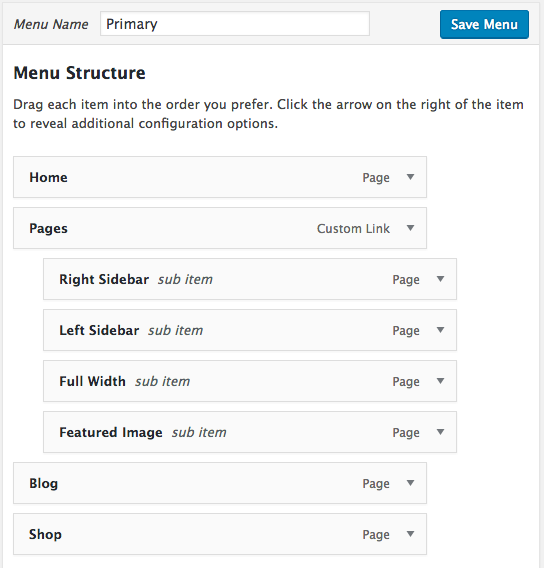
To create your menu navigate to Appearance > Menus and create a new menu. If you already have one you can edit it there. Add your menu items and drag them into the right order. Choose where to display your menu by ticking the right box. Meteorite can display up to four menus (primary, footer, 404 page, topbar)
If you want to create a mega menu like the one on the Meteorite demo page under the menu item Widgets, you have got to add some specific CSS classes to that menu item. Reveal the menu item options by clicking the small arrow on the right side in the first level. If there is no field CSS Classes you need to activate this field through the Screen Options on the very top right side. Add the class mega-menu if you want all the child menu items (2nd level) to be in a 4 column mega menu. You can also add the class menu-headings if you want to have the second level menu items as headings and the third level menu items as links.
04. Page templates
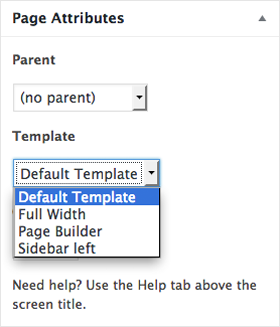
Meteorite comes with four different page templates. These templates have an impact on how the page looks. For example, the default template has got a sidebar on the right side, the full width template has no sidebar. The page builder template is like the full width template but doesn't have a page title and no padding on the top and the bottom of the page. Therefore it is used for pages created with a page builder.
Choose the page template you need: Go to Edit page and select the page template on the right side.
05. Adding rows and widgets
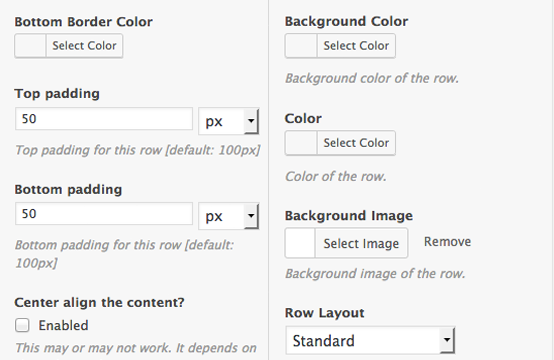
You can use the custom Meteorite widgets in all widget areas and whenever you use the page builder. Activate the page builder on a page by clicking the button on the right side above the textarea field. Then you can add rows and widgets. Style the row by hovering over the tool icon on the right side of each row and clicking on Edit Row. There, you can set multiple columns, set the row width, give the row a background color or image, change spacing and more.
Add your widgets by clicking on the row you want your widget to be in and click on Add Widget on the left side. Search for the widget you want or click on Meteorite Theme Widgets to filter them and choose one of the theme widgets. Nearly every widget comes with different types and customization options that you can choose from.
06. Changing fonts
Through the WordPress Customizer you can handle the fonts for headlines and for body text. You can use any Google Font you want. To change them navigate to Appearance > Customize > Fonts > Font selection.
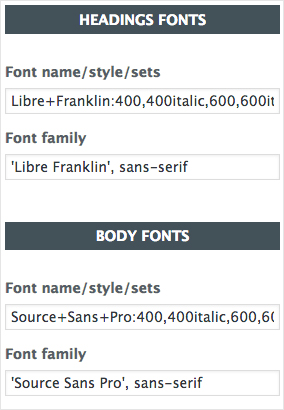
Font name/style/sets: Fill in the font name here. Spaces inside the name have to be replaced by a +. The name is followed by a colon and a comma-separated list of font styles you need (see the example below). In most cases you need only 400, 400italic, 600 and 600italic.
Default:
Heading fonts: Libre+Franklin:400,400italic,600,600italic
Body fonts: Source+Sans+Pro:400,400italic,600,600italic
Font family: Fill in the font name here too. If your font name is a single word, you are safe to just write it in. If your font name has spaces in the name, the complete font name has to be within single quotes. Furthermore you can use a comma-separated list of other fonts (only the ones that are installed on every device like Arial, Times New Roman, Helvetica) or just define serif or sans-serif as a fallback.
Default:
Heading fonts: 'Libre Franklin', sans-serif
Body fonts: 'Source Sans Pro', sans-serif
07. Onepage Layout
Of course you can create a onepage layout with Meteorite. If you have set up your site, you should define an ID for each row at the row settings. Then all you need to do is create a menu with custom links. Name them as you like. In the link field you have to put in e.g. #your-row-id.
If you have more than one site but want to keep the scrolling, you have to put in absolute links like http://www.example.com/#your-row-id.
You can also add the class smooth-scroll to a link to let it scroll along the site. Example:
<a href="#your-row-id" class="smooth-scroll">Your link text here</a>
08. Header Image
You can add a header image on every page by uploading your image as the featured image for the page. Navigate to Edit Page and you find the option on the right sidebar underneath the Page Attributes. If the featured image box isn't visible, click on Screen Options on the very top right side and set a tick at Featured Image.
Customize the header image through the WordPress Customizer at Appearance > Customize. There you can change the height, parallax, overlay and much more.

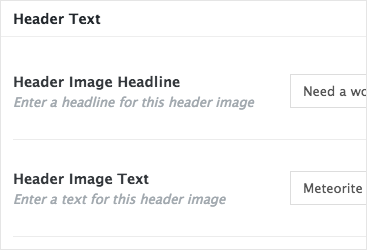
09. Header Text
You can add a page heading and text with the page meta boxes undearneath the WordPress Editor / Page Builder Editor.
Furthermore, you can choose the HTML tag that is used for the heading and the header text. Default is H2 for the heading and p for the text. This is useful if, for example, you want to use the heading as a page title.
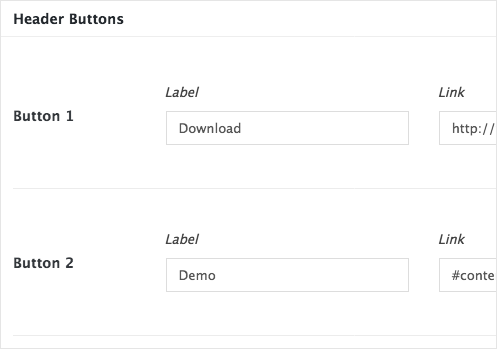
10. Header Buttons
You can add header image buttons with the page meta boxes undearneth the WordPress Editor / Page Builder Editor.
This option is only available if you have installed and activated the Meteorite Extensions plugin.
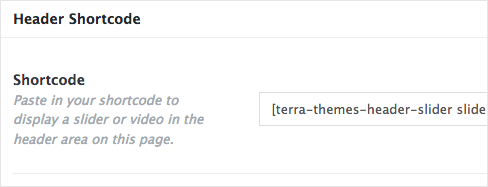
11. Header Shortcode
If you want a slider instead of a header image you can use a shortcode in the Header Shortcode page meta box underneath the WordPress Editor / Page Builder Editor. The shortcode can be one from the Terra Themes Slider or any other slider plugin.
This option is only available if you have installed and activated the Meteorite Extensions plugin.
12. Theme settings
Meteorite makes customizing your theme easy. All theme settings are located in the WordPress Customizer, available at Appearance > Customize. Create your own unique website with a live preview of your changes.
There are settings for the site information (including logo), preloader, page layouts, header style, colors, fonts, blog options and more. Make sure you check them all to discover the true power of Meteorite and make your website your own.
13. Animations
Meteorite uses some custom animations for the widgets. Most of them offer the animation types fade in, fade in up, fade in left and fade in right. You can use these animations on nearly any element you want, just add a CSS class to that element. The available classes are: fade-in, fade-in-up, fade-in-left, fade-in-right.
14. Action Hooks
Meteorite comes with a few action hooks throughout the theme. These can be used to modify the theme or add own content. To get more information use the WordPress Code Reference.
Use this only if you know what you do.
Available hooks:
meteorite_before_site (hooked: meteorite_preloader(), 7 and meteorite_fullscreen_search(), 8)
meteorite_before_header, meteorite_after_header
meteorite_inside_titlebar
meteorite_inside_hero, meteorite_after_hero
meteorite_before_footer, meteorite_after_footer
meteorite_before_content, meteorite_after_content
meteorite_inside_post_top, meteorite_inside_post_bottom
15. Features
Meteorite includes more than 100 customizable options and features like
- Responsive layout
- Demo import
- Parallax effects or fixed backgrounds
- Page templates: left sidebar, right sidebar, two sidebars, full width, page builder
- Drag and drop page builder support (Elementor and Page Builder by SiteOrigin)
- WooCommerce shop support
- Custom post types (clients, employees, testimonials, projects, Terra Slider)
- Boxed / wide layout
- Three different page preloader animations (wave, dots, circles)
- Logo / favicon upload
- Header images with custom text and buttons on every page
- Titlebar for subpages
- Five navigation types like default or with a topbar (claim / social media / navigation / contact information)
- Menu above, above (solid) or below the header area
- Sticky or static menu
- Boxed or wide menu
- Inline or centered menu
- Two mobile menu button types
- Search in navigation
- Two search types (fullscreen / search under menu)
- Footer background image
- Footer widget areas (1-4)
- Footer navigation / social media icons
- Your own footer credits!
- Five different blog types (full width, image left, two column grid, first post full width then grid, masonry style)
- Post author box
- Related posts and related projects on single posts
- Many more custom options to show / hide information on blog page, search, archives and single posts
- Unlimited color options
- Font options with options to use from 800+ Google Fonts
- Image and video slider by Terra Themes
- Support for all slider plugins in the header
- Over 20 custom and high quality widgets
- Professional looking widget animations (no bounce, rotate, wobble or flying through the screen here)